

Making arrows
...to feel smoothness of feathears and put an arrow on the string....
...breathe in fresh air and draw the string through strength of your arm and back...
...make your mind moveless calm, aim at one point and release the string...
... the sound of the flying arrow ... and you return to the old times, when stronghold of your arm and courage of your heart decided whether you would live or die...
Making arrows was the thing I started some years ago. This nice work, when we put together materials from different levels to make a completed arrow, makes me happy thanks its variety. Plant kingdom gives wood for shaft, animals provide feathers, silk, sinew and horn and from mineral unnature part of being there is iron for a forged arrowhead and nail. Really, not many things make harmony of such amount of diversed parts in one thing as arrows do.
Arrows are made only from pure natural materials, without using any modern materials. Also I often use old techniques and technologies, which give the arrows something more than an outer form and vision. There is a part of me, a part of my heart in each arrow.
I devided the description of my arrow production into three parts:
- Making shafts
- Preparing feathers
- Forging arrowheads
- Making shafts
Arrowshaft has been made of many different wood species. If we speak about Europe, shaft were either splitted from timber or made from suitable branches.
Poplar wood or pine wood is suitable for splitting. The piece of wood must be straigt-grained and without knots. After splitting shafts were worked down with a knife or plane, straightened and left to dry.
Hazel or viburnun were used for arrows made from branches.
I have used wood from many different trees. Now I work mostly with three species: ash, poplar and oak.
- Ash is a medium- heavy, medium- hard wood. It was used for heavy war arrows in England in medieval times. It´s not a problem to find goog quality wood.The arrows are very elastic and durable
- Poplar is a light and soft wood. Because of its excellent ratio of lightness and stiffness it was the most popular wood used for arrows in medieval times. Its white color looks elegant. It is recommended to use poplar arrows when we shoot on soft targets.
- I wanted to use oak for heavy, deep penetrating arrows. If I compare oak and poplar, it´s like steel and iron in blacksmithing. The oak is quite difficult to work with. The arrows from oak are heavy, claiming stronger bow.
I start choosing good quality wood. It must be without waves and knots and it needs to have suitable earlywood/latewood ratio. I work mostly with stave.
I saw a piece of stave long enough, i.e.1“ longer than shafts. Then I hand plane on side of the stave to follow the grain as much as posible. After that I saw the stave on a table cirkular saw. It´s not an old technique, but necessary to make a large amout of shafts in a relatively short time. Use splitting would take for about 30 minutes for one shaft more, it would carry loosing of materials.
After sawing I choose good quality timbers. Then I make them circular using a hand plane. I use an old plane which takes away only little amount of wood. After planing I make surface smoother using grit paper or wooden block with a hole. If I put the shaft through the hole and move it up and down, the surface of the shaft looks like a glass.
Mostly I make shafts of 3/8“ in diameter, or tapered from ½“ to 3/8“.These were more common in history. Shafts can be weighed or spinned if required – with toleration 1g and 5 lbs.
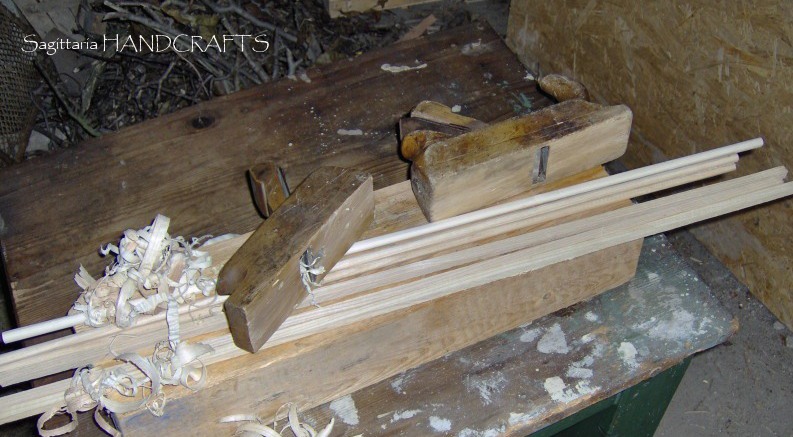
Hand plane and prepared shafts
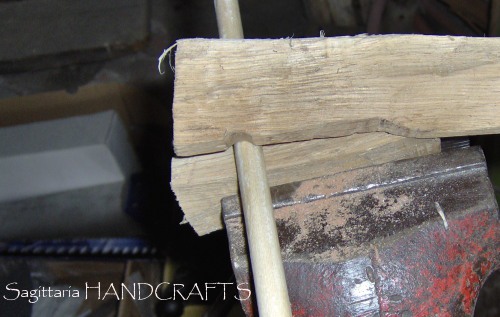
Plate of hard wood to polish the shafts
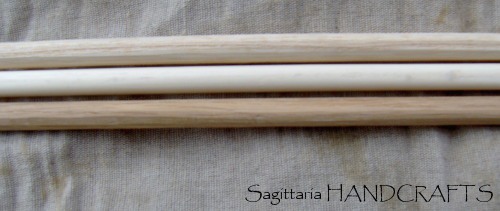 Ash, poplar and oak shaft
If I make only a selfnock, I use a file, a hand saw and little files. Cutting is vertical to wood yearrings because it protects the nock from splitting. I finish the surface with grip paper to feel the softness of the nock nice by your fingers.
The process is different, if a horn nock is inserted into a nock. This is how english war arrows were made.. The horn nock protects the nock from splitting, in case the bow is very heavy. Moreover, it is beautiful and it makes the arrow something special.
First I saw a plate from cow horn and file it to the right size, i.e.2“long and 1/16“ thick, as wide as a shaft. Simultaneously I saw a groow about 2“long into the shaft. The groow must perfecty fit into plate. If so, I glue the plate into the groow with hide glue. After some time, when the glue is dry, I clean and polish the horn plate to make it contrast with the wood shaft.
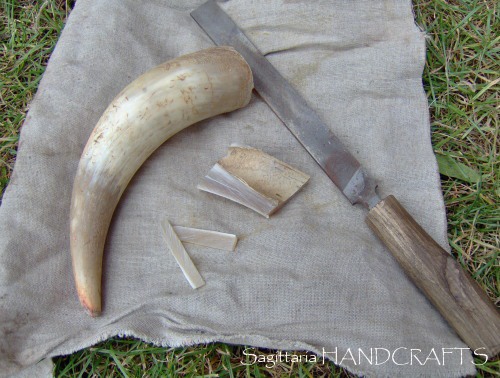
Cow horn, horn plates
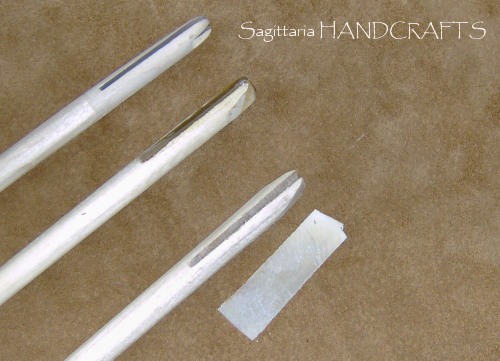
Process of inserting horn plate into nock
I will also mention here some possibilities of surface arrangement. First, I can leave shafts without any protection. Second, shafts can be coated with linen oil. The special case is to paint a shaft with extract from walnut peeling. Depending on the number of layers we can gain dark brown colour, which creates a nice combination with some species of feathers.
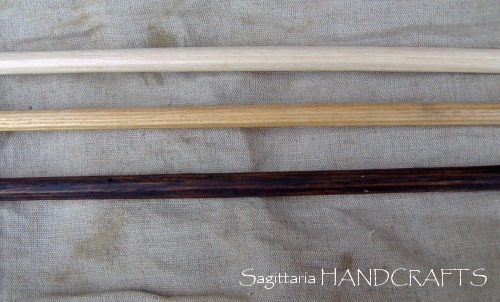
Ash, ash with linen oil, ash painted with extract from walnut peeling
2.Making fletches
Now have come to the animal kingdom. I use only natural fletches from mostly 4 species of birds: white goose, grey goose, turkey and peacock. All feathers are of the best natural quality.
I have divided feathers on base of according to their length into the following categories: 4“ and 6“ long.
- Goose: Feathers of very good quality, mostly used in Europe in history. I work with white goose feathers and very valuable grey goose feathers.
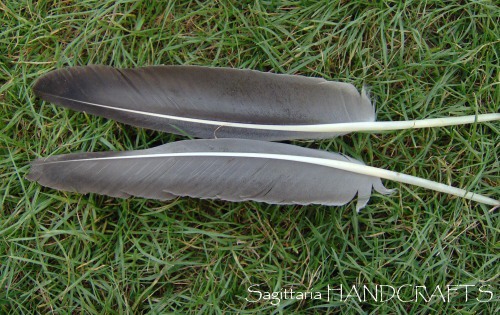
- Turkey: not used In Europe, originally from America. Very hard and durable feathers. The feathers can be white, dark and wild (white-black stripped).
- Peacock: used for „best“ arrows In medieval England. It is red-brown and dark-brown colour. It is not always available.
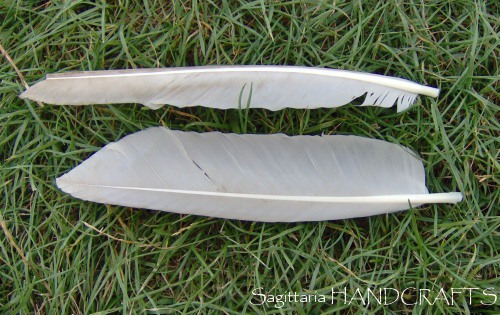
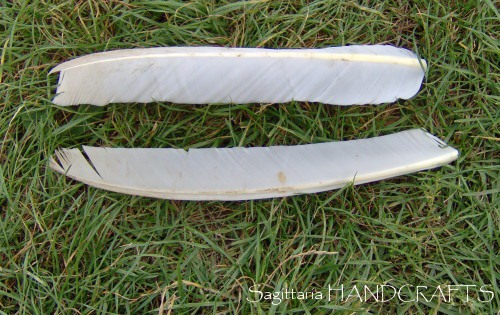
White goose
Grey goose
White turkey
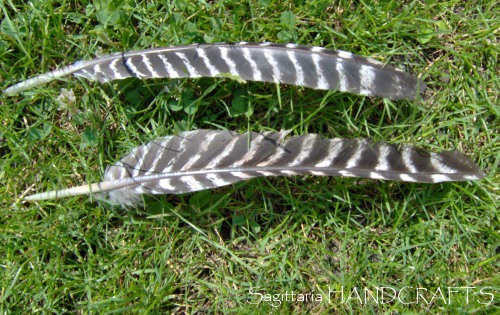
Wild turkey
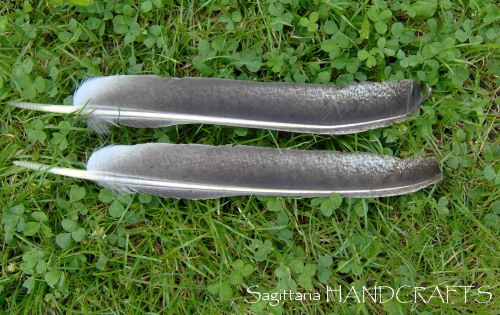
Dark turkey
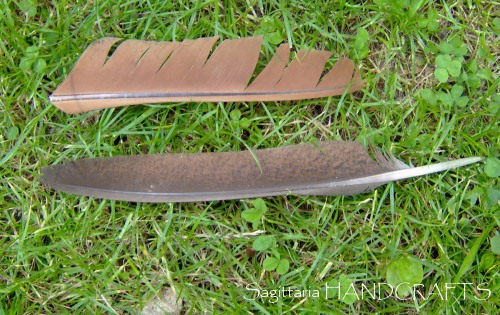
Peacock
I use 3 methods to fix feathers to the shaft:
- Tying with natural silk and glued with hide glue:
Shafts are tied on about 7 turns in an inch, either black or white natural silk, and glued with hide glue. Many fascinating combinations can be made, for example: the combination of silk colour, shaft colour and different types of feathers, like snow white silk on dark shaft with white goose and others.
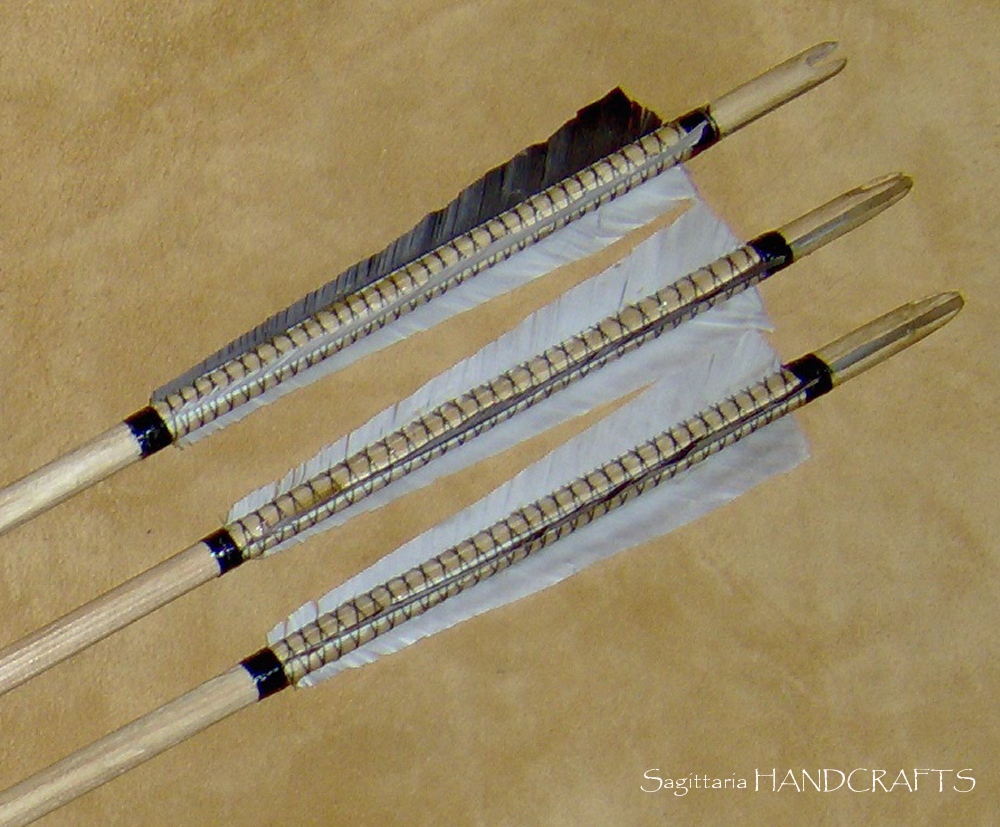
Ash arrows with horn nock cross-tied with natural silk
- Tying with bast and glued with wood tar:
See Making Historical Replicas – Nydam arrows
- Tying with natural sinew and glued with hide glue:
I use this type of tying when making pre-historic arrows. I work with deer sinew. First I must prepare it. I hit them it with a wooden hammer, until it gets white white. Then I separate thin fibres, as long and thin as possible.
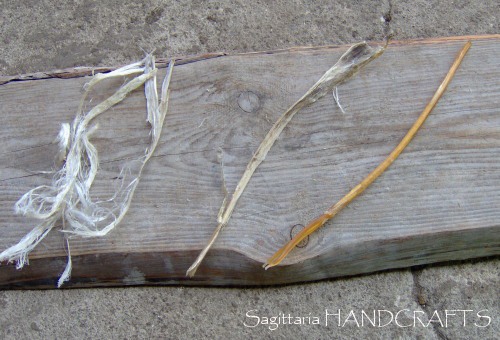
Preparing of sinew, from rigth to left
Before using them I must put them into warm water to make them soft and flexible. If well prepared, fibres of sinew can be wrapped around the shaft like any other fibre. It looks like a colourless or white rope. Feathers are wrapped only at the beginning and at the end.
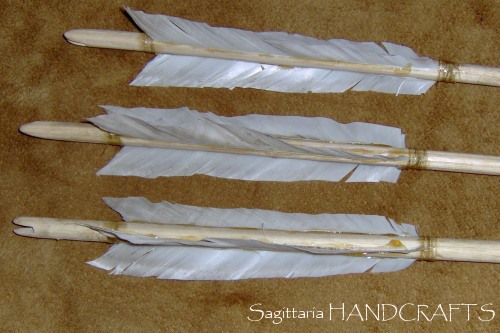
Sinew wrapped arrows
3. Forging of arrowheads

Hand forged arrowheads
When making arrowheads I work with unnature kingdom – mineral. Each arrowhead I make is hand smithed wihout using any other maschine, only only using a hammer, avil and coal. I work ether with iron or carbon steel, which can be hardened.
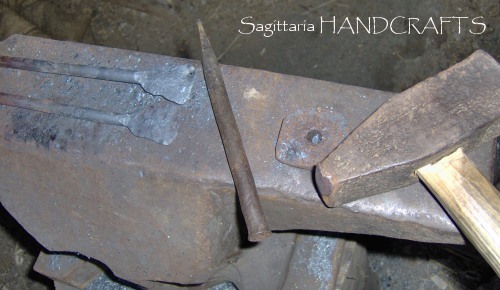
At the beginning there are iron rods. I put them into fire and wait till the colour of the iron is bright enough – mostly yellow colour (cca 1000 °C).
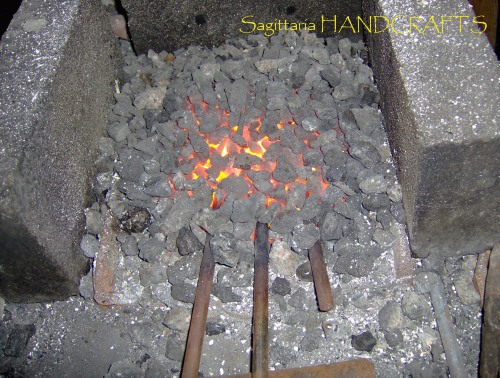
Iron rods in the fire
Then I take it and hammer out the ends to be as thin as a sheet of paper. I use a pike to make a hole for nail.
I screw it into a cone with requsitive diameter.
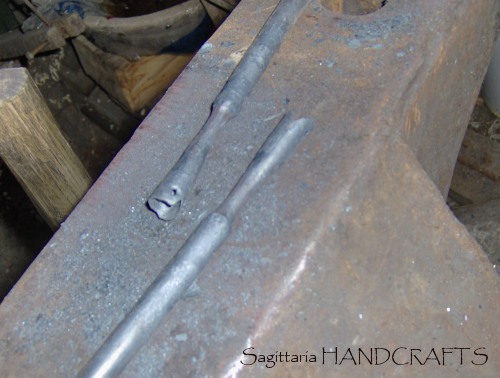
Arrowheads prepared for cutting
Then I hammer the neck of the arrowheads and cut off this part from the rest of the rod. The last step is forging the head. I forge many types of heads – bodkins, broadheads, swallowtails, as required.
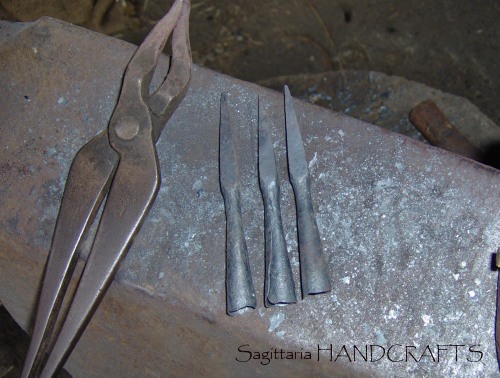
Forged arrowheads
Forging of small arroweads takes from about 15 minutes to 45 minutes (the most difficult types).
If I make hardened heads, forging takes a little more time because steel is more dificult to hammer. After smithing I leave the heads in the hot cinders to burn them. The reason is that the material is then easier to file. I file every head to the final shape, heat it again in the fire to the right temperature and put it quickly into cold water with salt. This makes the steel hardened. I wait for a while, take the head out, clean the surface of iron and watt for the right colour. When the point becomes yellow-brown, I put it into the water again and cool it completely. This process is called tempering.
I polish the hardened arrowheads on rotated sandstone and on the Rozsutec stone. This gives them as fine surface as possible that can be made by hand.
Every head is fixed to the shaft with a small nail. This nail also is hand forged.
The fixed arrowhead is finally glued with hide glue.
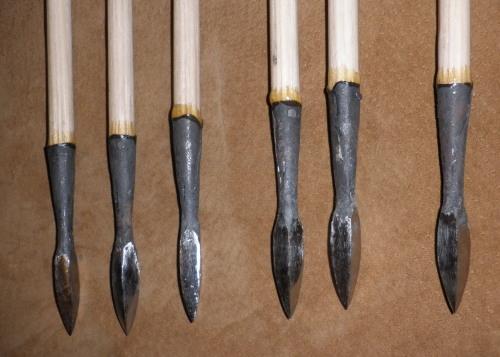
Hardened polished arrowheads, fixed on shaft with nail and hide glue
The completely process of making one arrow takes 1-2 Hour, depends on type.